• Skip to primary navigation
  • Skip to main content
  • Skip to primary sidebar
Sunlit Spaces | DIY Home Decor, Holiday, and More

Sunlit Spaces | DIY Home Decor, Holiday, and More

Scattering sunshine on all aspects of home decor on a budget, organization ideas for the home and holiday decorations.

  • DIY Ideas
  • Home Decor Ideas
  • Holiday
  • Organization
  • About Me
  • Newsletter
  • Privacy Policy
  • Menu Item
  • Menu Item
  • Menu Item

No-Carve Ways to Decorate Pumpkins

September 21, 2017 by Jackie Leave a Comment

No-Carve Ways to Decorate Pumpkins| Pumpkin Decor, DIY Pumpkin Decor, How to Decorate Pumpkins, No Carve Ways to Decorate Pumpkins, Simple Ways to Carve Pumpkins, How to Carve Pumpkins Without Sharp Tools, Popular Pin

Carving pumpkins is certainly a Halloween tradition for many, but not everyone enjoys the mucky mess. And some of us have little kids that we would rather not worry about mixing with sharp tools! There are plenty of no-carve ways to decorate pumpkins. Let me show you a few ideas that I found.


Fancy up your pumpkins with lace or pretty ribbons. All you need to securely attach the lace or ribbon to your pumpkin is decoupage glue, such as Mod Podge. It’s quick and easy!

Choose ribbon or lace, then attach to pumpkins, candle holders or even wine glasses with a few swipes of Mod Podge. Let dry, then display. Done! What you'll need: black lace, ($7, amazon.com), decoupage glue ($7, amazon.com)

Brittni Mehlhoff at Paper & Stitch shows you how to “dip” your pumpkins…in balloons! Can you believe how awesome these look?

Balloon Dipped No-Carve Pumpkin Idea for Halloween

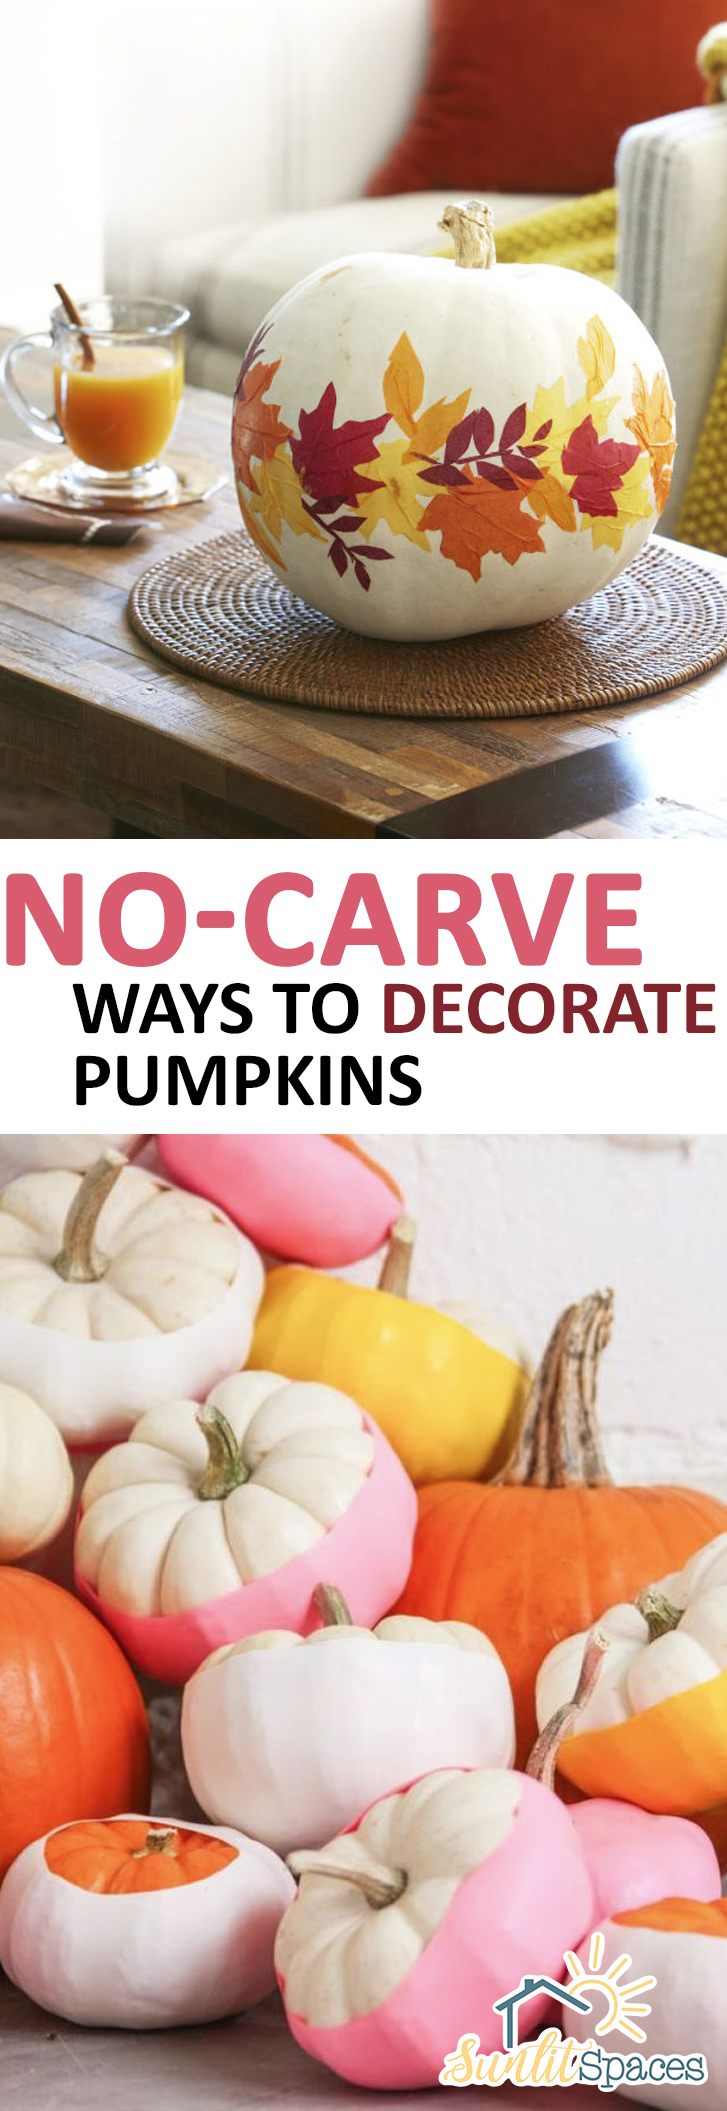
Paint some of your pumpkins in a bright color {such as this pink} and arrange them with their unpainted counterparts. It’s an unexpected look that totally works. DIY a fun and festive banner by cutting flag shapes out of thick construction paper, spelling out your message and attaching to the mantel using ribbon or twine. What you'll need: black cardstock ($8, amazon.com), black ribbon ($10, amazon.com)

Trace your favorite Fall leaves onto tissue paper, cut out, and decoupage them around the perimeter of a white pumpkin. It’s a striking look that is certainly unique!

Paper leaves encircling a white pumpkin make a graphic statement. Trace fallen leaves onto orange, yellow and dark red tissue paper; cut tracings out and stick them to pumpkin using decoupage glue. With a flat-head bristle brush, push from leaves' outer edges toward the centers to pucker paper slightly and create "veins"; let dry. Brush a thin layer of glue over pumpkin. What you'll need: tissue paper ($14, amazon.com), decoupage glue ($7, amazon.com)

Use a foil doily as a spider web! Just decoupage it onto the surface of a pumpkin and attach a spooky spider.

Print template, place over foil doily and cut along lines with craft knife. Apply to pumpkin with decoupage glue, cutting notches around edge so it lies flat. Use glue dot to attach plastic spider. What you'll need: Foil doily ($11; amazon.com); Decoupage glue  ($10; amazon.com); Glue dots  ($4; amazon.com); Plastic spider ($2; amazon.com).

Over at Country Living see how to recreate this Woody Wagoneer pumpkin scene for your front porch.

Trace the Wagoneer template on plaid fabric, scaling up or down as necessary, and cut out; attach to a pumpkin with small map tacks. Cut the wood panel from wood grain-patterned Duck Tape, and attach to the wagon. Use hot-glue to attach silver cording to the wagon to outline the windows and wood panel. Glue a small spiral of cording to create the gas cap and a zigzag to create the bumpers. Hot-glue small wood slices for the wheels and small twigs to the roof to create the roof rack. Top with a toy canoe and oars.  What you'll need: Plaid fabric ($3 for 60 inches; amazon.com), Wood grain Duck Duct Tape ($5; jet.com), Silver cording ($3 for 10 inches; papermart.com), Wood discs ($2 for 7; michaels.com)

Pendleton blanket patterns are recreated on pumpkins with only washi tape. Genius! Countless Americans have curled up under this Oregon company's throws since 1909. We let some of the more iconic Pendleton patterns (Crossroads, Serrado, and Spirit Guide) inspire these motifs, all created with colorful washi tape. Follow our templates to get the look. What you'll need: Washi masking tapes ($13 for a set of 20; amazon.com)

Use nail heads or brass tacks to spell out a short word on a painted {or even unpainted} pumpkin.

Create a tack-o'-lantern with this office store staple. Paint pumpkin desired color in a matte finish. Write letters with an erasable wax pencil, then use a hammer to tap in nailheads along the script. (The shorter the word, the more clearly it will read.)

Let visitors know they’re in the right place all season long–decorate pumpkins with your home state and house number. I love this idea!

Let revelers know they're at the right address by emblazoning your house number—and state—on pumpkins. Get the tutorial.

Filed Under: DIY Ideas, Halloween, Holiday Tagged With: DIY Halloween, DIY Halloween Decor, DIY Pumpkin Decor, Halloween, No Carve Pumpkin Decor Ideas, no carve pumpkins, Pumpkin DIYs

Reader Interactions

Leave a Reply Cancel reply

Primary Sidebar

Follow Us on Social Media

Pinterest Facebook Twitter

**Posts may contain affiliate links and I will be compensated if you make a purchase after clicking on my links

Sign Up For Our Newsletter

RSS The Latest

  • DIY Recycled 4th Of July Crafts
  • Patriotic 4th Of July Porch Decor On Etsy
  • DIY Collage Wall Prints
  • DIY Boho Basket Wall
  • Grad Brag Board And Tables: Easy Way To Display Accomplishments

Copyright © 2023 · Genesis Sample on Genesis Framework · WordPress · Log in