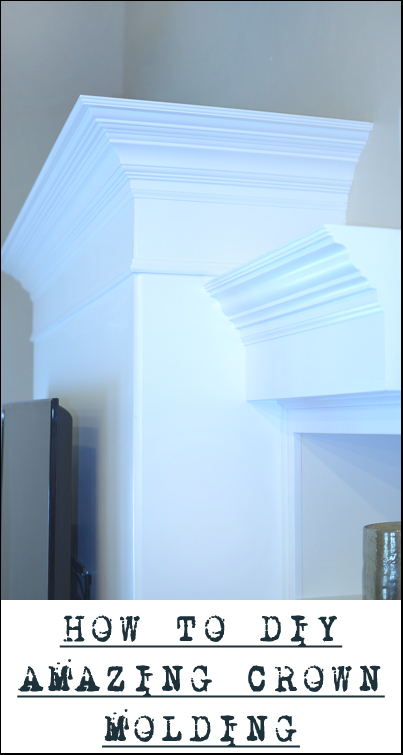
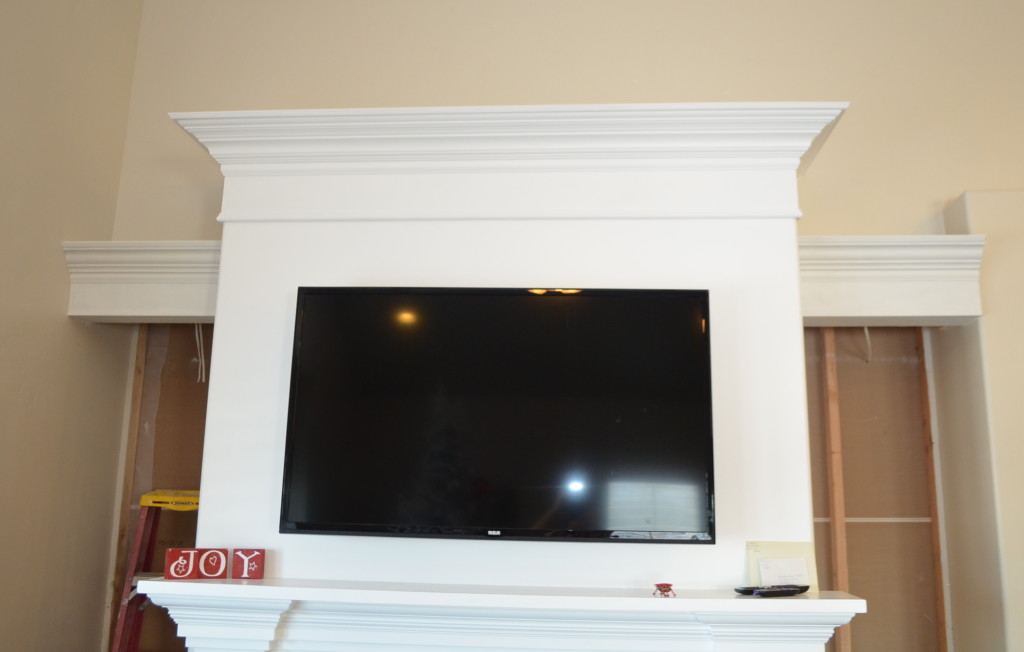
I had a lot of fun with this project, I think mostly because it made such a big difference in the feel of our new built in cabinets and fireplace without too much effort. Here is my tutorial on how to make stunning crown molding on your own!
In order to make a really fantastic crown molding you need to build it up with additional types of trim. I used 5 different pieces to get this look. My first bit of advice is to go to Lowes for the molding, for some reason Home Depot does not have the same large molding selection that Lowes does. Here is what I bought for this project, I did not find anything even similar at Home Depot. I thought for the size of crown as well that this price was not too bad for a 12 footer.
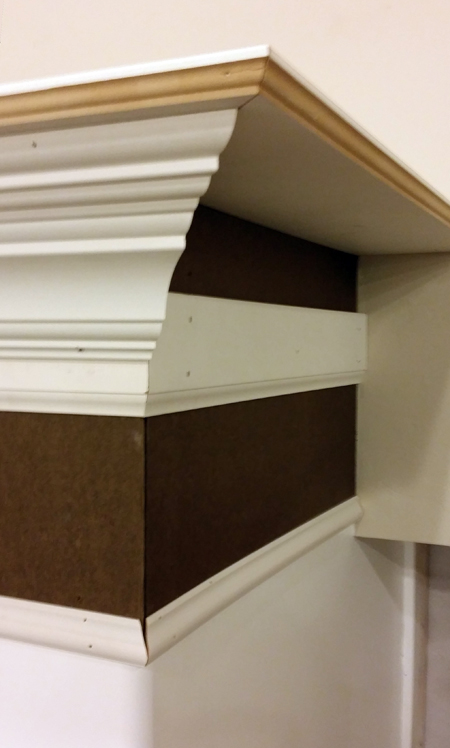
In order to get the large look I was going for I decided to do 1/4″ masonite board behind the whole thing, I had it extend down about 7″ below the bottom of the crown, at the bottom of the masonite I put a stepped piece of trim to cover the bottom edge, this is the trim used to cover the top of wainscoting a lot of times.
I put the crown molding on top of a 2-1/2″ piece of baseboard installed upside down, this added some height to it. On the top I used a 12″ wide piece of mdf and I routered an edge to make the crown look wider from underneath. My crown was not against a ceiling and that is why this piece was so wide, but you could still do this on a ceiling and use another piece of baseboard.
As a word of caution this large of crown molding will need a large miter saw to cut, I used the Dewalt 12″ sliding miter saw and it worked well.
Once that was all up I caulked all the joints and edges, filled the nail holes with painters putty, and painted. I had to use a couple of coats of primer to cover the masonite and trim properly, but after the last coat of white went on, it was sure fun to see the end result.
On the sides where it stepped down I did the same procedure only I used smaller crown and baseboard. But I thought I should mention that so you could see that it does not necessarily need to match exactly to go together.
Leave a Reply